My favorite model
After completing a couple of quilt tops and getting the basics of piecing down (pictures of those to come – they are still works in progress) I decided it was time to make a gift. It also gave me my first chance to make a quilt with SNOOPY. My cousin – with whom I share a love of Snoopy – was expecting her second child. Benjamin has since joined the world, but at the time, we didn’t know if he was a boy or a girl, so I tried to keep the colors neutral. I think I learned a LOT about color design ideas from seeing the finished product . . .
I did some searching online for modern baby quilts, and decided I really liked this framed block look. I did some calculations, came up with my cuts, and proceeded to my trusty cutting mat. After getting the blocks together, I had my first challenge piecing it together. My design wall is actually my design floor. My biggest critic (and fan!), Niels, kept suggesting ways to make some order and symmetry out of the top. All I knew was that I wanted it random. We compromised on having each of the corner squares framed in the same blue. So then I started putting it together.
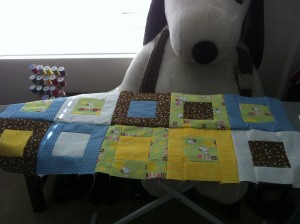
Snoopy approves
Here it is in process. My ironing board is behind my sewing chair. On the other side of the ironing board is our guard dog, a five foot Snoopy. He seems to be happy with my progress. And yes, Niels is quite patient. Not only does he not object to the five foot stuffed animal in our dining room . . . he’s been fairly relaxed about the whole “our dining room is now a sewing room” thing.
Once I finished the quilt top, I stopped. My one previous attempt at using my walking foot on something bigger than a placemat ended with about an hour of stitch pulling after the fabric gathered together. I was scared. I signed up for a free motion quilting class (more on that later) and tried to gather the courage to finish the quilt. Benjamin was born the weekend of the free motion quilting class, so the time pressure to complete it before he was born – gone. Phew.
When I got home from the class, I practiced free motion quilting. And practiced. But I was still gun shy. So I broke the walking foot back out, used a lot of pins for the basting, and remembered by previous error of not starting in the center. I used a Sulky Blendable in a green-blue-yellow for the top (I’ve also given up on the monofilament thread that breaks in my machine) and went for it. Relying on my trusty quilting guide, I wound up with this grid pattern, leaving the center blocks untouched. I love the way it looks on the back. Onto my first binding exercise, I found the fabric I had the most of from the top, and when at it, throwing in a little bit of brown for some interest. Though I’d read about the hand sewing to finish the binding, I hadn’t realized what a big job it was! Hours and hours later (and appreciating the wonders of the thimble), I finally finished. I was so excited when I saw how FINISHED the binding looked – I didn’t know I could make something that looked so orderly and neat!
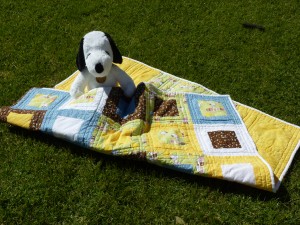
I crossed my fingers, threw it into the washing machine, and hoped it would stay intact. It did! Even Niels was impressed with how it looked when it came together. I was so proud! I proceeded to my first photo shoot in the front yard. I couldn’t keep Snoopy off it. I sense you’ll see him in more shoots. I do have to figure out how to take some good pics of my work. . . So the quilt was sent to its new home, and I gained so much confidence.
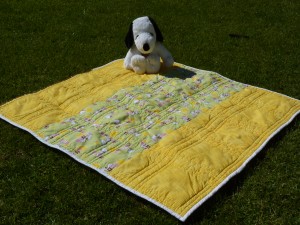
The back - a good view of the grid
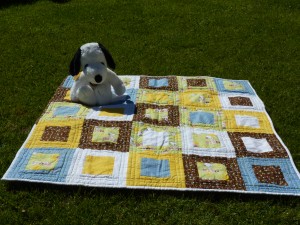
The finished front - Snoopy and all

